How to Rotate a Video: a Step-by-Step Guide

Have you ever recorded a video only to realize later that it’s oriented incorrectly? Perhaps it’s sideways or upside down, and you’re wondering how to fix it. Fortunately, rotating a video is a simple task, and we’ll guide you through it step by step. Whether you’re using a computer or a mobile device, we’ve got you covered.
In this blog, we’ll explore four easy ways to rotate your video step by step. If you want to know how to rotate a video, read on!
Table of Contents:
How to Rotate a Video Online?
Rotating a video online is an easy option if you don’t want to download any software and app. Many websites such as Clipfly offer free video editing tools that allow you to quickly and easily edit your video and adjust the orientation.
Here’s how to rotate a video clip with Clipfly:
1. Access Clipfly, and click on the “Upload” button to import the video you want to rotate from your device.
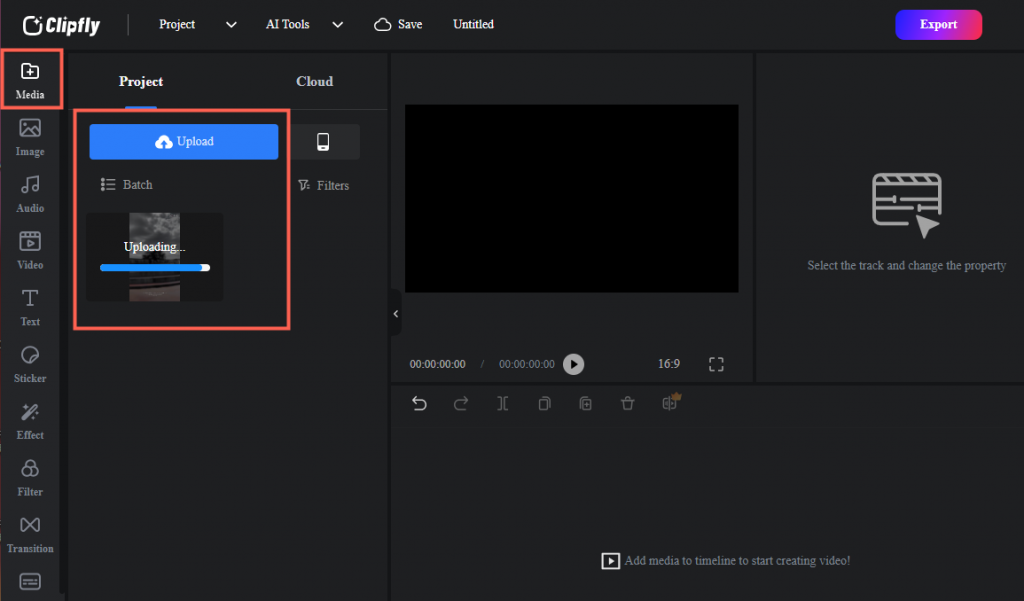
2. Drag and drop your video to the timeline, or you can click the blue “+” icon to add it to the timeline.
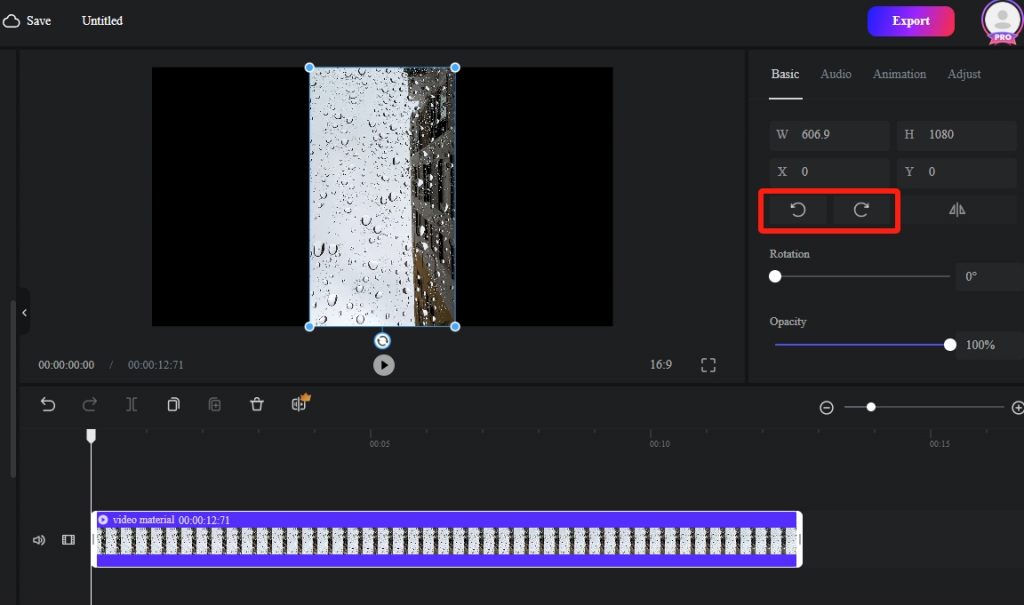
3. Next, you will see a tool panel on the right side of the video, find the video rotator option. You can choose to rotate to the left or to the right, and rotate once at an angle of 90 degrees. You can also flip your video using the video flipper tool.
4. Furthermore, you can explore the other video editing features to customize your video, such as adding music to enhance the vibe, and merging your video clips to showcase more frames.
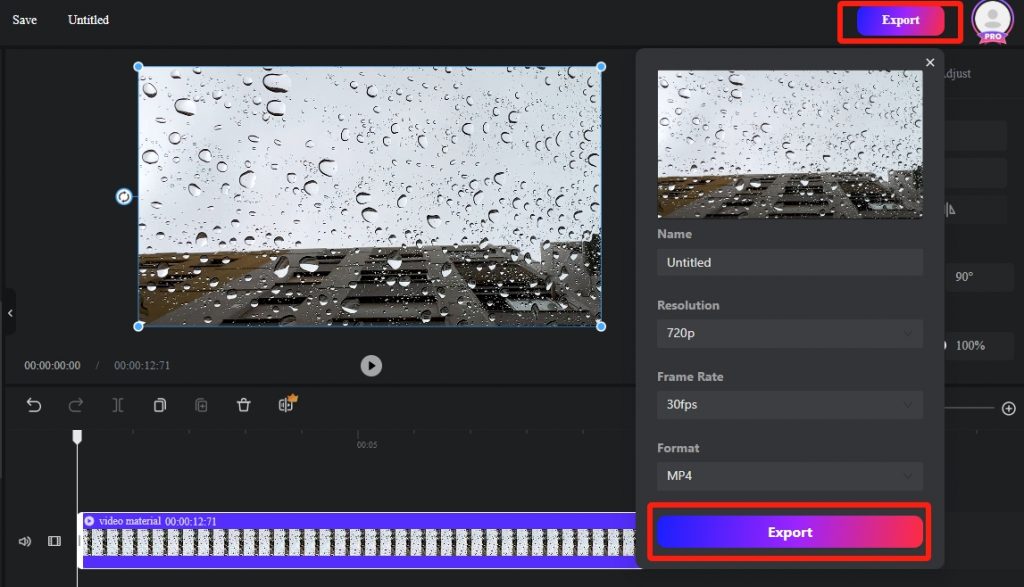
5. After making the adjustments, click on the “Export” button to save the rotated video to your PC.
How to Rotate a Video on Windows?
Rotating a video on Windows is a simple process with the built-in Video Editor app. While Windows’ built-in video editing tool doesn’t have as many features and clips as a one-stop video editor like Clipfly, it’s still a very convenient and user-friendly tool that’s perfect for newbies to do basic video editing.
Here’s how to turn video sideways:
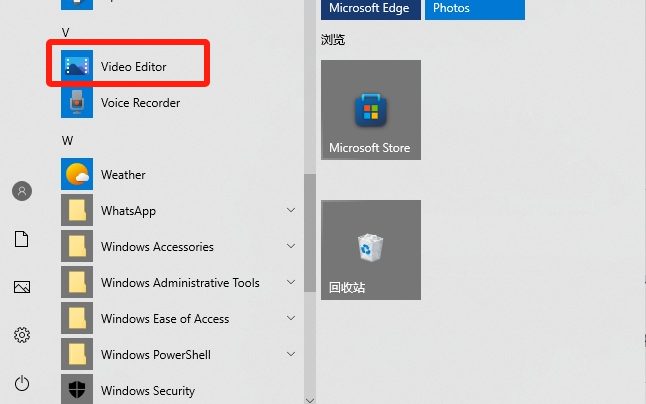
1. To use this tool, Search Video Editor into your search bar. Or click the Windows (Start) icon on your device, and scroll your mouse to select the Video Editor.
2. Next, click the “New Video Project” button to get started. You can name your video file or just skip this step.

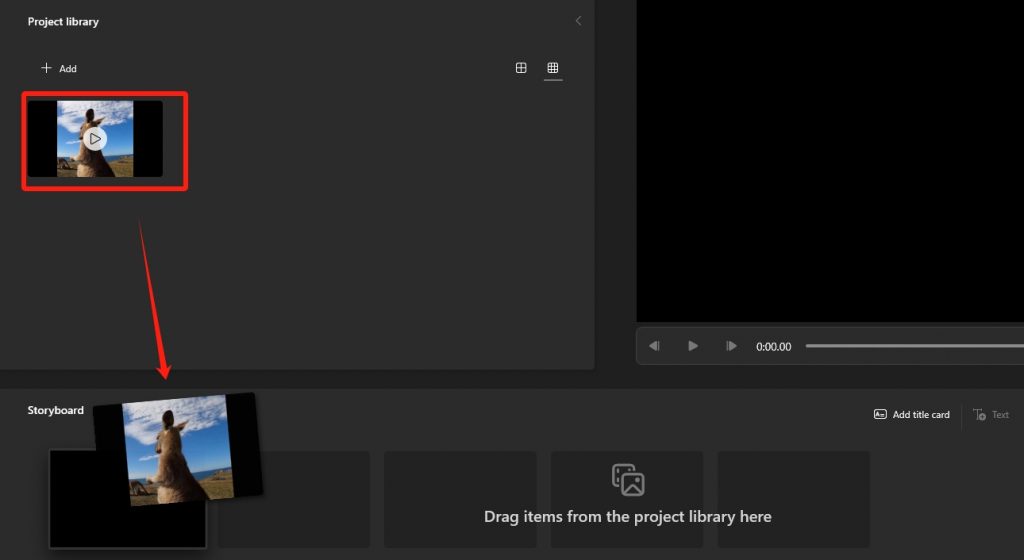
3. Click the “Add” button to import your video to the video editor. Then, drag and drop the uploaded video to the storyboard.
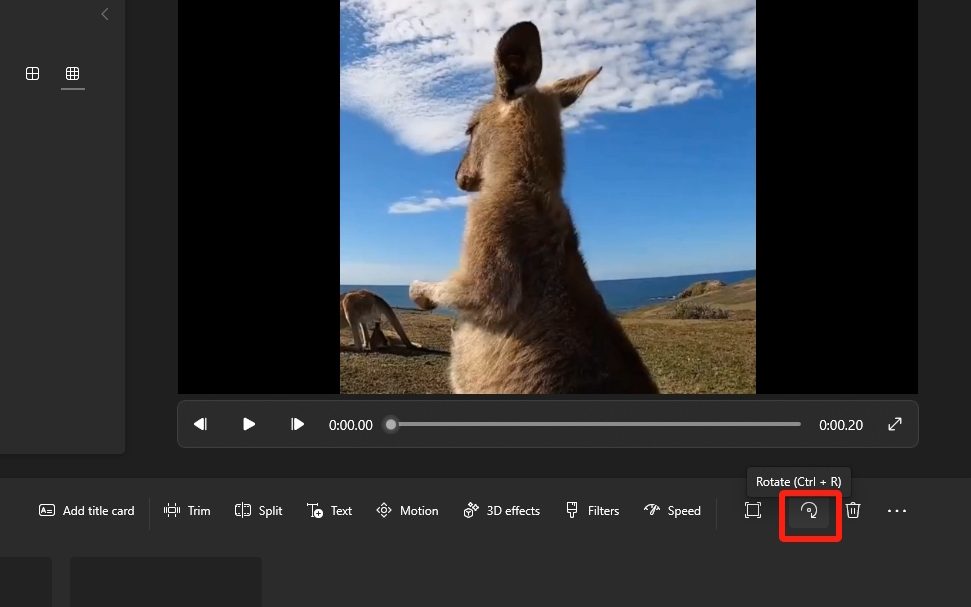
4. You can see the toolbar on the right side of the story panel, select the rotate tool icon and your video will be rotated 90 degrees clockwise in one click. If you need to rotate 180 degrees, then repeat this action.
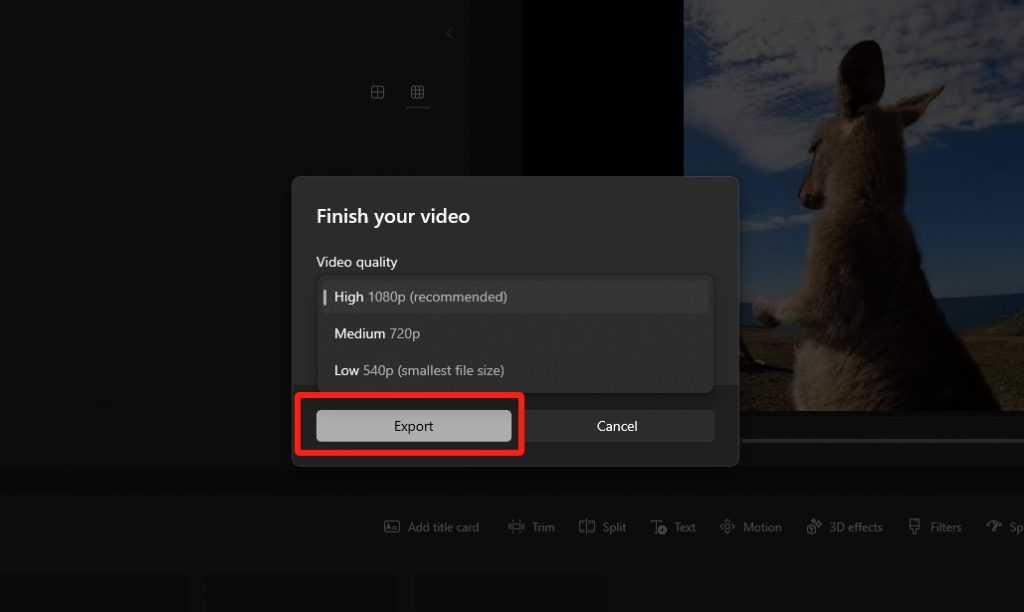
5. When you are satisfied with the rotated video, click the “Finish video” to save your project. You can choose the output video quality, such as 540p, 720p, or 1080p. Once saved in your preferred destination folder, you can now watch the rotated MP4 video whenever you want.
How to Rotate a Video on Mac & iPhone?
For those users who use Apple devices, you can easily rotate videos with the built-in app iMovie.
On Mac:
If you don’t have iMovie installed, you can download it from the Mac App Store.
1. Open iMovie and click on “Create New” to create your new project, and choose “Movie” as the project type.
2. Click on the “Import Media” button and select the video you want to rotate from your PC.
3. Drag and drop the video clip onto the timeline at the bottom of the iMovie interface.
4. Select the video clip on the timeline by clicking on it.
5. In the preview window on the right, click on the “Crop to Fill” button, which looks like a square with two arrows forming a circle. This will open the video cropping and rotation tools.
6. Click on the “Rotate Left” or “Rotate Right” button to rotate the video in the desired direction. You can also manually adjust the rotation angle by clicking and dragging the rotation handle.
7. Finally, preview and download your rotated video by clicking on the “File,” next, select “Share” > “File.” You can choose your export quality and click “Next” to save the video to your desired location on your Mac.
On iPhone:
1. Just like on Mac, open your iMovie app on your iPhone, and create a new project by tapping “Create Movie.”
2. Tap on the “Media” tab to access your video clips and photos. Choose the video you want to rotate and add it to your timeline by tapping on it.
3. To rotate the video, tap on the “Adjustments” icon (it looks like a magic wand).
4. Use the rotation button to rotate the video 90 degrees at a time. You can keep tapping the button until the video is rotated to your desired orientation.
5. After rotating the video, tap the “Play” button to preview your rotated video. Once you are satisfied with the rotation, tap the “Done” button in the top-left corner.
6. To save the rotated video to your Camera Roll or share it, tap the “Share” button (it looks like an arrow pointing upward). Follow the prompts to export the video with the rotation applied.
How to Rotate a Video on Android?
It is easy for you to rotate a video clip on your Android device using the Google Photos app. You can download this app from the Google Play Store.
1. Open the Google Photos app on your Android device, and tap the video you want to rotate in your Google Photos library.
2. Once the video is open, tap on the “Edit” icon at the bottom of the screen to explore the editing tools.
3. Find the video rotator tool, the icon for this option typically looks like a circular arrow or a rotate symbol. Tap on it to rotate the video 90 degrees at a time. You can keep tapping until the video is rotated to your desired orientation.
4. Once you are satisfied with your video. Tap the “Save” to save your changes.
Conclusion
Whether you’re using a computer or a mobile device, you now have the tools and knowledge to rotate a video with ease. With the step-by-step guide we outlined, learn how to rotate a video and enjoy your video in the correct orientation.
Don’t let misaligned videos bother you anymore, give these methods a try today!